Before swinging a hammer or ordering materials, smart homeowners and designers are pulling out their laptops. 3D visualization in interior design has stopped being a luxury tool for architects and contractors, it’s now accessible to anyone planning a renovation, redesign, or new build. This technology lets you walk through your future kitchen, bedroom, or living space digitally, catching design conflicts and spatial challenges before a single nail gets driven. Whether you’re a DIYer tackling a bedroom refresh or a design professional landing client bids, 3D visualization saves time, money, and regret. Let’s dig into why this tool matters and how to use it effectively in 2026.
Key Takeaways
- 3D visualization in interior design lets you identify design conflicts and spatial challenges digitally before construction begins, saving time, money, and costly rework.
- Cost savings are maximized through 3D visualization by testing layouts, materials, and configurations virtually, reducing material waste and preventing expensive mid-project changes.
- Enhanced client communication accelerates approval timelines when clients see photorealistic renderings instead of abstract sketches, making design decisions clearer and revisions easier to cost out.
- Popular 3D visualization tools range from beginner-friendly options like SketchUp’s free tier to professional-grade software like Revit, allowing homeowners and professionals to choose based on budget and project complexity.
- Accurate measurements and a systematic workflow—from base modeling to design layering, client feedback, and 2D construction document export—ensure 3D visualization projects stay coordinated from concept to construction.
- 3D visualization applications span residential renovations, commercial spaces, and property marketing, enabling contractors, designers, and realtors to test traffic flow, material performance, and spatial efficiency before implementation.
What Is 3D Visualization and Why It Matters for Interior Design
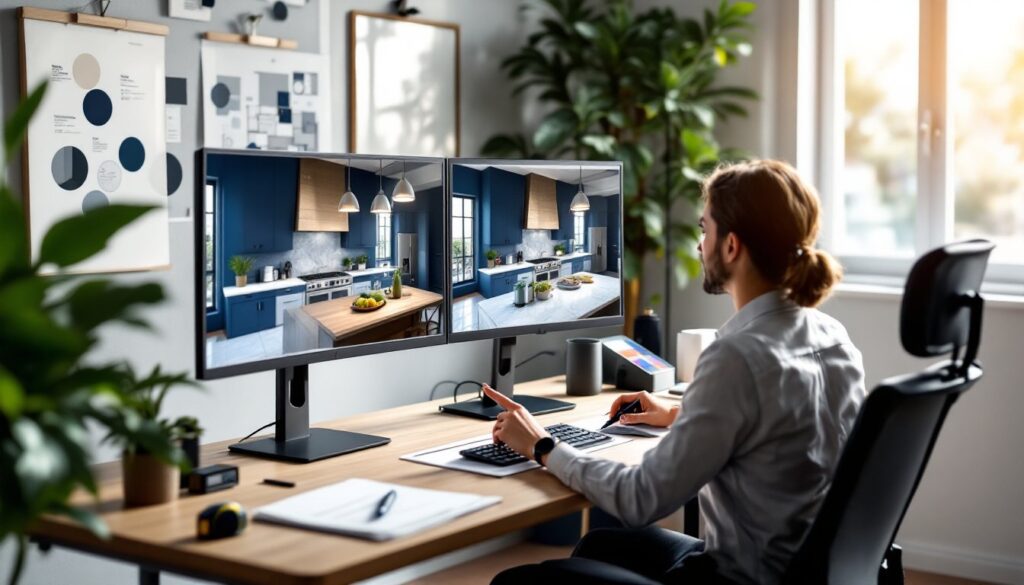
3D visualization is a digital rendering of a physical space using architectural and design software. Unlike a 2D floor plan or sketch, a 3D model shows width, depth, height, lighting, materials, colors, and spatial relationships in a realistic (or photorealistic) format. You can move through the space virtually, rotate objects, change material finishes, adjust lighting, and swap furniture or fixtures in real time.
For interior design, this technology bridges the gap between concept and reality. A homeowner might imagine a room with navy walls and marble countertops, but seeing it rendered in 3D clarifies whether the color feels too dark under your actual lighting or whether that layout actually works with foot traffic. Designers use 3D visualization to present multiple concept options to clients without producing physical mock-ups, and contractors can identify conflicts, like a door swing hitting cabinetry, before framing begins.
The shift toward 3D visualization reflects how design decisions have real consequences. A misplaced electrical outlet, a poorly proportioned island, or an undersized window can derail a project months into construction. 3D models catch these issues at the design stage, when changes cost nothing but mouse clicks.
Key Benefits of Using 3D Visualization for Your Design Projects
Cost Savings and Risk Reduction
3D visualization’s biggest payoff is financial. When you can see potential problems, clashing design elements, spatial inefficiencies, or material mismatches, before you break ground, you avoid costly rework. A homeowner redesigning a kitchen might spend a few hours tweaking layouts and material selections in a 3D tool instead of discovering mid-renovation that the custom cabinetry doesn’t fit the actual wall dimensions.
Risk reduction extends to material waste. You can test island sizes, cabinetry configurations, and finishes digitally, reducing the chance of over-ordering or selecting materials that clash in person. For contractors, 3D visualization prevents claims disputes, you’ve shown the client exactly what they’re paying for, and they’ve approved it before the first subcontractor arrives.
Enhanced Client Communication and Approval
Misunderstandings dissolve when everyone’s looking at the same 3D model. A designer can walk a client through color choices, furniture placement, lighting angles, and material finishes in a single session. Clients see their investment rendered photorealistically, not as abstract sketches or tiny swatches. This clarity accelerates approval timelines and reduces back-and-forth revisions.
Design changes are also easier to visualize and cost out in 3D. If a client wants to swap that dark oak flooring for light oak, you render both versions and discuss trade-offs in materials, durability, and maintenance. The client understands the impact before committing to a change order.
Popular Tools and Software for 3D Interior Design Visualization
The options for 3D visualization range from free, beginner-friendly tools to professional-grade software with steep learning curves.
SketchUp (free version and paid Pro) remains the workhorse for interior designers and contractors. Its intuitive interface, massive 3D model library, and lower barrier to entry make it ideal for homeowners and small shops. You can import furniture models, adjust dimensions, apply materials, and generate photo-realistic renderings with plugins like V-Ray.
Blender is open-source and powerful, but it demands more time to master. Architects and advanced DIYers use it for detailed lighting studies and complex material simulations. There’s no licensing cost, but the learning curve is steep.
Lumion specializes in photorealistic rendering. It’s pricier than SketchUp but excels when you need stunning client presentations. The software renders scenes quickly and handles materials, lighting, and environmental effects beautifully.
AutoCAD paired with 3ds Max or Revit dominates in professional architecture and large-scale commercial projects. These tools handle complex MEP (mechanical, electrical, plumbing) coordination and building information modeling (BIM) but cost significantly more and require formal training.
For quick, AI-assisted visualization, newer tools like RoomGPT, Foyr, and Interior AI let users upload a photo and apply design styles instantly, useful for mood boards and initial concepts, though less precise for construction-level planning.
Your choice depends on your budget, learning capacity, and project complexity. A homeowner refreshing a bedroom might use SketchUp’s free tier: a contractor managing multi-unit residential projects might need Revit’s BIM capabilities.
How 3D Visualization Streamlines the Design Workflow
Integrating 3D visualization into your design process isn’t just about making pretty pictures, it changes how decisions get made.
Start with accurate measurements. Use a laser tape measure or floor plan to capture room dimensions, door and window locations, ceiling height, and any architectural quirks (alcoves, sloped ceilings, load-bearing walls). Sloppy measurements trash even the best 3D model. Enter these into your software and build a base model of the existing space.
Once the shell is accurate, layer in design elements: flooring, wall colors, cabinetry, fixtures, and furniture. Test multiple variations side by side. Toggle lighting on and off to see how natural and artificial light interact with your material selections. Check traffic patterns, can someone actually move through the space, or does the island block the only path to the kitchen?
Pass the model to your client (or contractor, or spouse) for feedback. Most tools let you generate walk-throughs, 360-degree renders, or interactive 3D files that others can explore without needing the software installed. This feedback loop catches preferences or concerns early, before you’ve spent time on detailed drawings or material specs.
Finally, export 2D construction documents from your 3D model. Accurate floor plans, elevations, and section views pull directly from the 3D geometry, reducing transcription errors. This handoff from design to construction stays coordinated because they’re working from the same model.
Real-World Applications: From Residential to Commercial Spaces
3D visualization adapts to nearly every scale and sector. A homeowner planning a master bath renovation might spend 3–4 hours in SketchUp modeling the existing bathroom, positioning a new shower enclosure and vanity, testing tile layouts, and confirming that the door swing doesn’t hit the toilet. That time investment pays off by catching a critical dimension error before ordering a custom shower pan.
For realtors and property flippers, 3D renderings of “after” states help market properties before renovation. Staging a vacant house in 3D is cheaper and faster than physical staging, and buyers can envision potential more clearly.
Contractors managing multi-room renovations use 3D models to coordinate mechanical, electrical, and plumbing runs with structural and finish work. A framing error that would’ve cost tens of thousands to correct on-site shows up in the 3D model and gets fixed in the CAD file.
Commercial designers, restaurants, retail, offices, rely on 3D visualization to test traffic flow, lighting performance, and material durability in high-traffic settings. A restaurant designer can adjust kitchen layout, test cook-to-pass distances, and confirm that dining tables don’t obstruct servers’ paths.
Small additions, like a home office nook or mudroom, also benefit from 3D visualization. You see exactly how much floor space you have, whether built-in shelving fits, and whether there’s room for a small desk and chair without the space feeling cramped.